

利用yolov5实现口罩佩戴检测算法并转换瑞芯微模型

文章目录
一、参考文献
利用yolov5实现口罩佩戴检测算法(非常详细)
目标检测—数据集格式转化及训练集和验证集划分
二、下载数据集
在这附上博主用的口罩数据集链接:https://pan.baidu.com/s/1Gud8jemSCdjG00TYA74WpQ
提取码:sv74
下载之后是mask.zip,解压之后是有两个文件夹images和labels,images是图片这里大概8000张图片,这里的lables已经是txt(yolo的训练标签就是txt),而一般的标签都是xml格式。标签:0:no-mask,1:mask
三、转换数据集
这呢,推荐大家去看炮哥的这篇博客,目标检测—数据集格式转化及训练集和验证集划分
这里因为博主用的数据集因为标签已经是txt格式了,但我先将txt转xml格式,再用代码直接将xml格式转为yolo(txt)格式并划分训练集和测试集。(这里不直接用txt的格式直接划分,炮哥是这样解释的,txt划分后放入训练会出错)
本例子中我的做法将区别于他们所有人的做法,我是先用炮哥的代码把yolo的txt转换为xml;然后将所有的images和labels放入一个img的文件夹,然后用自己的代码划分训练集和验证集。
1、新建文件夹
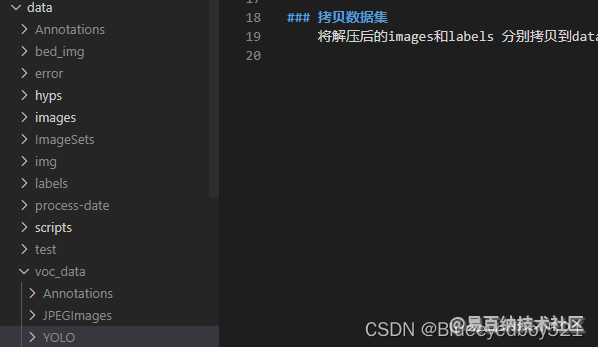
在/data/下新建voc_data文件夹,在voc_data文件夹下新建Annotations,JPEGImages,YOLO
- Annotations:存放转换之后的xml标注
- JPEGImages:将解压后的images中的图片全部拷贝到此
- YOLO:将解压后的txt文件全部拷贝到次
2、将txt的标注转换为xml
在data目录下新建yolo_to_voc.py,注意main方法中的路径
from xml.dom.minidom import Document
import os
import cv2

# 参考链接:https://blog.csdn.net/didiaopao/article/details/120022845

# def makexml(txtPath, xmlPath, picPath):  # txt所在文件夹路径,xml文件保存路径,图片所在文件夹路径
def makexml(picPath, txtPath, xmlPath):  # txt所在文件夹路径,xml文件保存路径,图片所在文件夹路径
    """此函数用于将yolo格式txt标注文件转换为voc格式xml标注文件
    在自己的标注图片文件夹下建三个子文件夹,分别命名为picture、txt、xml
    """
    dic = {'0': "no-mask",  # 创建字典用来对类型进行转换
           '1': "mask",  # 此处的字典要与自己的classes.txt文件中的类对应,且顺序要一致
           }
    files = os.listdir(txtPath)
    for i, name in enumerate(files):
        xmlBuilder = Document()
        annotation = xmlBuilder.createElement("annotation")  # 创建annotation标签
        xmlBuilder.appendChild(annotation)
        txtFile = open(txtPath + name)
        print("文件:",txtPath + name)
        txtList = txtFile.readlines()
        img = cv2.imread(picPath + name[0:-4] + ".jpg")
        Pheight, Pwidth, Pdepth = img.shape

        folder = xmlBuilder.createElement("folder")  # folder标签
        foldercontent = xmlBuilder.createTextNode("driving_annotation_dataset")
        folder.appendChild(foldercontent)
        annotation.appendChild(folder)  # folder标签结束

        filename = xmlBuilder.createElement("filename")  # filename标签
        filenamecontent = xmlBuilder.createTextNode(name[0:-4] + ".jpg")
        filename.appendChild(filenamecontent)
        annotation.appendChild(filename)  # filename标签结束

        size = xmlBuilder.createElement("size")  # size标签
        width = xmlBuilder.createElement("width")  # size子标签width
        widthcontent = xmlBuilder.createTextNode(str(Pwidth))
        width.appendChild(widthcontent)
        size.appendChild(width)  # size子标签width结束

        height = xmlBuilder.createElement("height")  # size子标签height
        heightcontent = xmlBuilder.createTextNode(str(Pheight))
        height.appendChild(heightcontent)
        size.appendChild(height)  # size子标签height结束

        depth = xmlBuilder.createElement("depth")  # size子标签depth
        depthcontent = xmlBuilder.createTextNode(str(Pdepth))
        depth.appendChild(depthcontent)
        size.appendChild(depth)  # size子标签depth结束

        annotation.appendChild(size)  # size标签结束

        for j in txtList:
            oneline = j.strip().split(" ")
            object = xmlBuilder.createElement("object")  # object 标签
            picname = xmlBuilder.createElement("name")  # name标签
            namecontent = xmlBuilder.createTextNode(dic[oneline[0]])
            picname.appendChild(namecontent)
            object.appendChild(picname)  # name标签结束

            pose = xmlBuilder.createElement("pose")  # pose标签
            posecontent = xmlBuilder.createTextNode("Unspecified")
            pose.appendChild(posecontent)
            object.appendChild(pose)  # pose标签结束

            truncated = xmlBuilder.createElement("truncated")  # truncated标签
            truncatedContent = xmlBuilder.createTextNode("0")
            truncated.appendChild(truncatedContent)
            object.appendChild(truncated)  # truncated标签结束

            difficult = xmlBuilder.createElement("difficult")  # difficult标签
            difficultcontent = xmlBuilder.createTextNode("0")
            difficult.appendChild(difficultcontent)
            object.appendChild(difficult)  # difficult标签结束

            bndbox = xmlBuilder.createElement("bndbox")  # bndbox标签
            xmin = xmlBuilder.createElement("xmin")  # xmin标签
            mathData = int(((float(oneline[1])) * Pwidth + 1) - (float(oneline[3])) * 0.5 * Pwidth)
            xminContent = xmlBuilder.createTextNode(str(mathData))
            xmin.appendChild(xminContent)
            bndbox.appendChild(xmin)  # xmin标签结束

            ymin = xmlBuilder.createElement("ymin")  # ymin标签
            mathData = int(((float(oneline[2])) * Pheight + 1) - (float(oneline[4])) * 0.5 * Pheight)
            yminContent = xmlBuilder.createTextNode(str(mathData))
            ymin.appendChild(yminContent)
            bndbox.appendChild(ymin)  # ymin标签结束

            xmax = xmlBuilder.createElement("xmax")  # xmax标签
            mathData = int(((float(oneline[1])) * Pwidth + 1) + (float(oneline[3])) * 0.5 * Pwidth)
            xmaxContent = xmlBuilder.createTextNode(str(mathData))
            xmax.appendChild(xmaxContent)
            bndbox.appendChild(xmax)  # xmax标签结束

            ymax = xmlBuilder.createElement("ymax")  # ymax标签
            mathData = int(((float(oneline[2])) * Pheight + 1) + (float(oneline[4])) * 0.5 * Pheight)
            ymaxContent = xmlBuilder.createTextNode(str(mathData))
            ymax.appendChild(ymaxContent)
            bndbox.appendChild(ymax)  # ymax标签结束

            object.appendChild(bndbox)  # bndbox标签结束

            annotation.appendChild(object)  # object标签结束

        f = open(xmlPath + name[0:-4] + ".xml", 'w')
        xmlBuilder.writexml(f, indent='\t', newl='\n', addindent='\t', encoding='utf-8')
        f.close()

if __name__ == "__main__":
    # picPath = "VOCdevkit/VOC2007/JPEGImages/"  # 图片所在文件夹路径,后面的/一定要带上
    # txtPath = "VOCdevkit/VOC2007/YOLO/"  # txt所在文件夹路径,后面的/一定要带上
    # xmlPath = "VOCdevkit/VOC2007/Annotations/"  # xml文件保存路径,后面的/一定要带上
    picPath = "voc_data/JPEGImages/"  # 图片所在文件夹路径,后面的/一定要带上
    txtPath = "voc_data/YOLO/"  # txt所在文件夹路径,后面的/一定要带上
    xmlPath = "voc_data/Annotations/"  # xml文件保存路径,后面的/一定要带上
    makexml(picPath, txtPath, xmlPath)
- 1
- 2
- 3
- 4
- 5
- 6
- 7
- 8
- 9
- 10
- 11
- 12
- 13
- 14
- 15
- 16
- 17
- 18
- 19
- 20
- 21
- 22
- 23
- 24
- 25
- 26
- 27
- 28
- 29
- 30
- 31
- 32
- 33
- 34
- 35
- 36
- 37
- 38
- 39
- 40
- 41
- 42
- 43
- 44
- 45
- 46
- 47
- 48
- 49
- 50
- 51
- 52
- 53
- 54
- 55
- 56
- 57
- 58
- 59
- 60
- 61
- 62
- 63
- 64
- 65
- 66
- 67
- 68
- 69
- 70
- 71
- 72
- 73
- 74
- 75
- 76
- 77
- 78
- 79
- 80
- 81
- 82
- 83
- 84
- 85
- 86
- 87
- 88
- 89
- 90
- 91
- 92
- 93
- 94
- 95
- 96
- 97
- 98
- 99
- 100
- 101
- 102
- 103
- 104
- 105
- 106
- 107
- 108
- 109
- 110
- 111
- 112
- 113
- 114
- 115
- 116
- 117
执行转换
python yolo_to_voc.py
- 1
转换之后在data/voc_data/Annotations中就都是xml了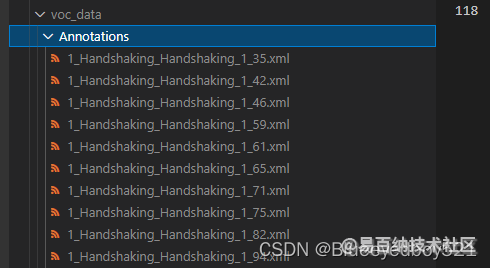
注意数据集中有个labels是错误的,类型是none,需要删除否则程序会报错,可以在代码的21行加上print(“文件:”,txtPath + name),找到具体哪个文件有问题。
3、划分训练集和验证集
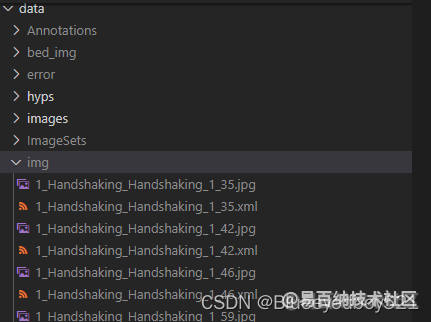
将voc_data/Annotations和JPEGImages都拷贝到data/img目录下
cp -rp data/voc_data/Annotations/* data/img/
cp -rp data/voc_data/JPEGImages/* data/img/
- 1
- 2
拷贝划分程序process-date文件夹到data目录下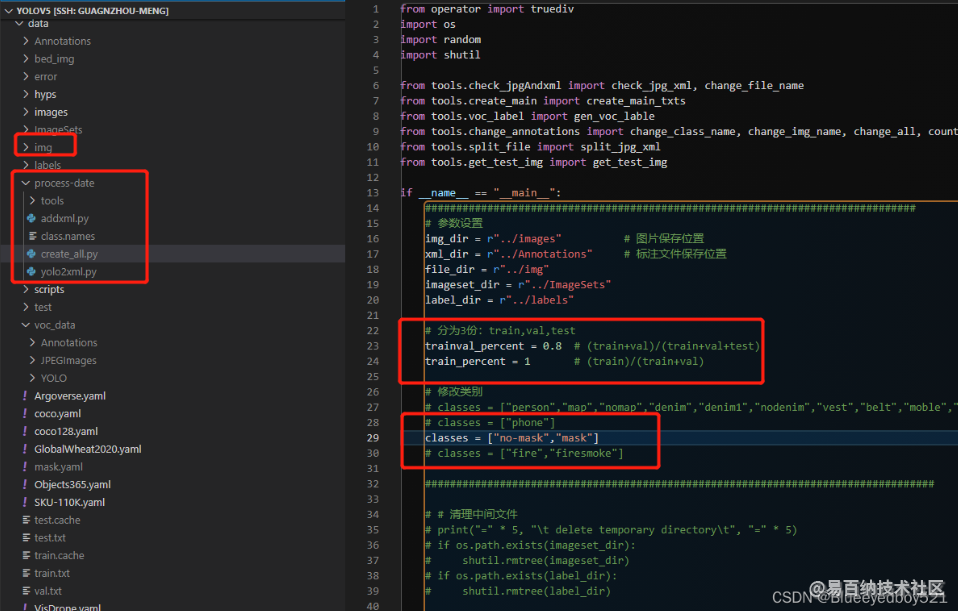
注意修改create_all.py中的类别,然后执行
python create_all.py
- 1
本代码会自动划分训练集和验证集,并把错误的图片或者标注文件筛选出来
四、训练
我们使用yolov5l.pt的预训练模型来训练
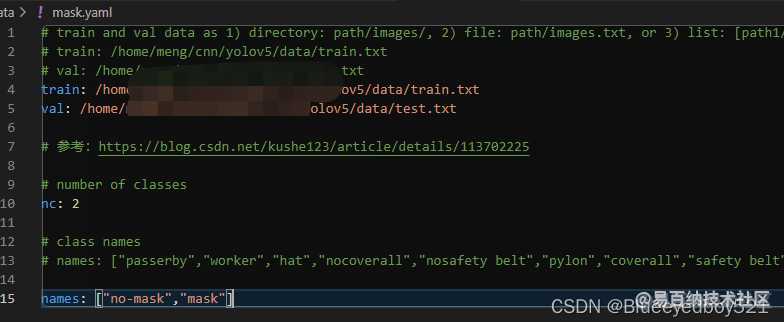
1、准备mask.yml
在data目录下新建mask.yml。指定路径和类别
2、修改models/yolov5l.yaml
修改识别类型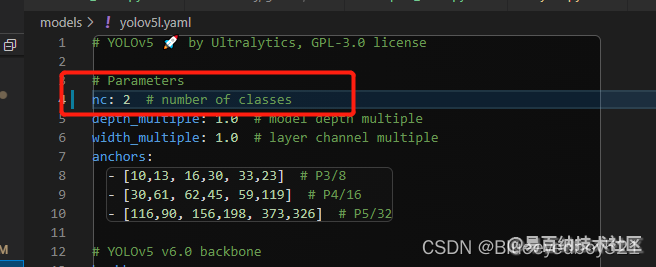
3、新建train_mask.py
cp train.py train_mask.py
- 1
重点修改如下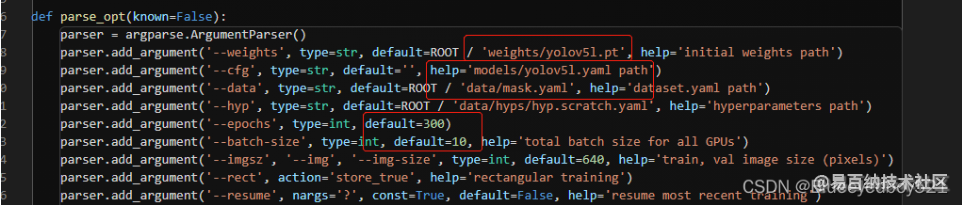
epochs设置训练300轮
batch-size设置10,可以根据gpu的性能设置,默认是16
4、训练
python train_mask.py
- 1
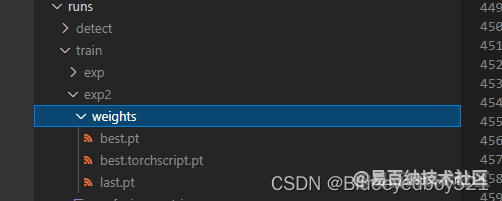
5、生成的模型
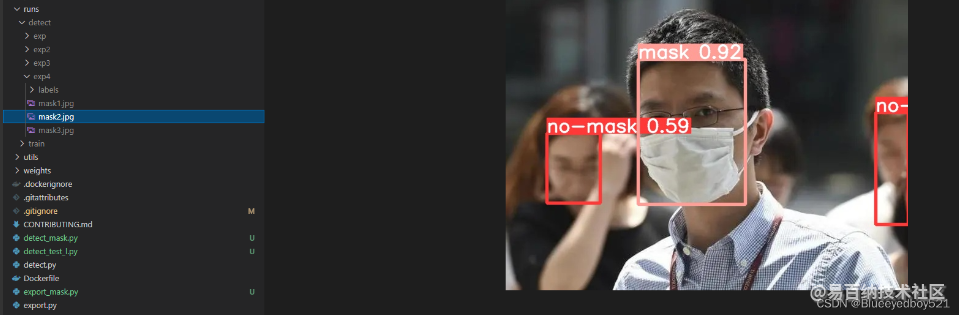
五、推理验证
1、新建detect_mask.py
cp detect.py detect_mask.py
- 1
2、推理图片
python detect_mask.py --source data/test/
- 1
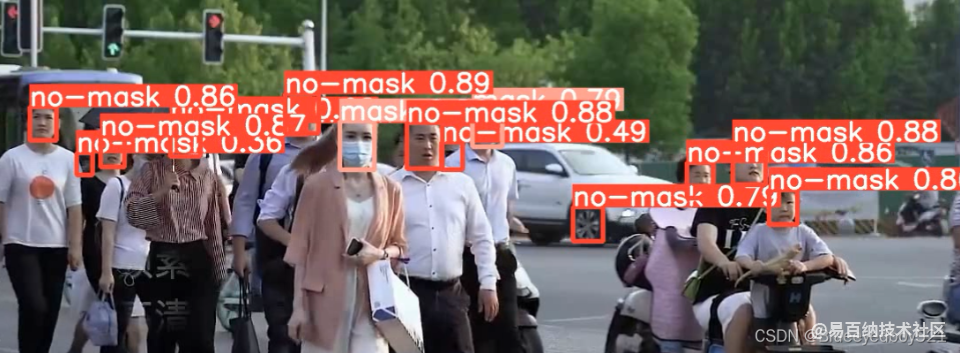
3、推理视频
下载行人视频
lux https://www.bilibili.com/video/BV1Q54y1L74D
- 1
推理
python detect_mask.py --source D:\ai\mask.mp4
- 1
六、转换瑞芯微
1、导出中间模型
修改models/yolo.py
修改注释,切记导出完之后改回去,否则推理,训练都会报错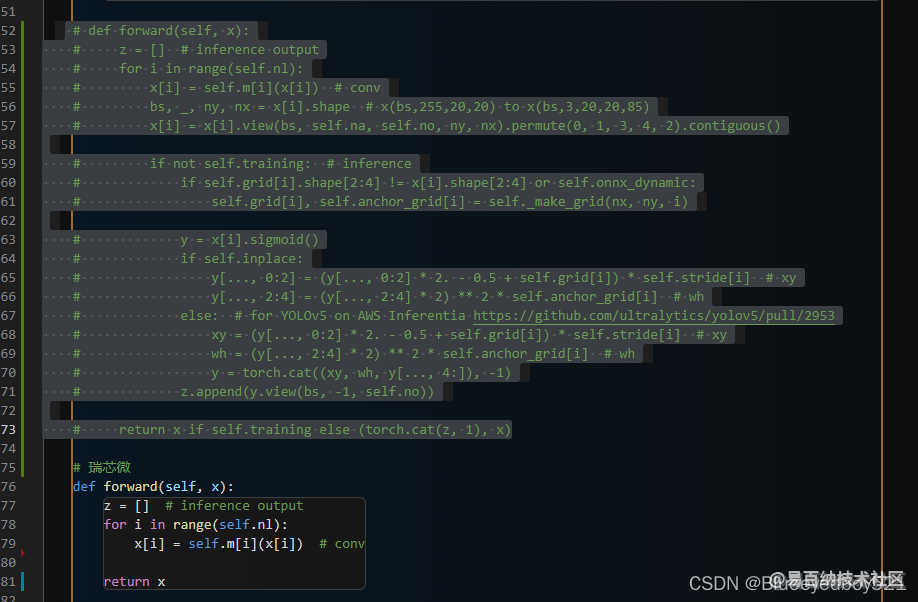
导出
cp export.py export_mask.py
- 1
修改如下
python export_mask.py
- 1
会在best.pt目录下生成best.torchscript.pt
2、中间模型转换瑞芯微模型
rk工具路径:
/cnn/rknn/rknn-toolkit-master/examples/pytorch/yolov5
- 1
拷贝中间模型
将best.torchscript.pt拷贝到rk工具路径中
mv best.torchscript.pt /cnn/rknn/rknn-toolkit-master/examples/pytorch/yolov5/mask.torchscript.pt
- 1
新建convert_mask.py
代码如下,重点
- PT_MODEL = ‘mask.torchscript.pt’
- RKNN_MODEL = ‘mask.rknn’
import os
import numpy as np
import cv2
from rknn.api import RKNN


PT_MODEL = 'mask.torchscript.pt'
RKNN_MODEL = 'mask.rknn'

IMG_PATH = 'bus.jpg'
DATASET = './dataset.txt'

# QUANTIZE_ON = False
QUANTIZE_ON = True

BOX_THRESH = 0.5
NMS_THRESH = 0.6
IMG_SIZE = 640

CLASSES = ("person")

def sigmoid(x):
    return 1 / (1 + np.exp(-x))

def xywh2xyxy(x):
    # Convert [x, y, w, h] to [x1, y1, x2, y2]
    y = np.copy(x)
    y[:, 0] = x[:, 0] - x[:, 2] / 2  # top left x
    y[:, 1] = x[:, 1] - x[:, 3] / 2  # top left y
    y[:, 2] = x[:, 0] + x[:, 2] / 2  # bottom right x
    y[:, 3] = x[:, 1] + x[:, 3] / 2  # bottom right y
    return y

def process(input, mask, anchors):

    anchors = [anchors[i] for i in mask]
    grid_h, grid_w = map(int, input.shape[0:2])

    box_confidence = sigmoid(input[..., 4])
    box_confidence = np.expand_dims(box_confidence, axis=-1)

    box_class_probs = sigmoid(input[..., 5:])

    box_xy = sigmoid(input[..., :2])*2 - 0.5

    col = np.tile(np.arange(0, grid_w), grid_w).reshape(-1, grid_w)
    row = np.tile(np.arange(0, grid_h).reshape(-1, 1), grid_h)
    col = col.reshape(grid_h, grid_w, 1, 1).repeat(3, axis=-2)
    row = row.reshape(grid_h, grid_w, 1, 1).repeat(3, axis=-2)
    grid = np.concatenate((col, row), axis=-1)
    box_xy += grid
    box_xy *= int(IMG_SIZE/grid_h)

    box_wh = pow(sigmoid(input[..., 2:4])*2, 2)
    box_wh = box_wh * anchors

    box = np.concatenate((box_xy, box_wh), axis=-1)

    return box, box_confidence, box_class_probs

def filter_boxes(boxes, box_confidences, box_class_probs):
    """Filter boxes with box threshold. It's a bit different with origin yolov5 post process!

    # Arguments
        boxes: ndarray, boxes of objects.
        box_confidences: ndarray, confidences of objects.
        box_class_probs: ndarray, class_probs of objects.

    # Returns
        boxes: ndarray, filtered boxes.
        classes: ndarray, classes for boxes.
        scores: ndarray, scores for boxes.
    """
    box_classes = np.argmax(box_class_probs, axis=-1)
    box_class_scores = np.max(box_class_probs, axis=-1)
    pos = np.where(box_confidences[...,0] >= BOX_THRESH)


    boxes = boxes[pos]
    classes = box_classes[pos]
    scores = box_class_scores[pos]

    return boxes, classes, scores

def nms_boxes(boxes, scores):
    """Suppress non-maximal boxes.

    # Arguments
        boxes: ndarray, boxes of objects.
        scores: ndarray, scores of objects.

    # Returns
        keep: ndarray, index of effective boxes.
    """
    x = boxes[:, 0]
    y = boxes[:, 1]
    w = boxes[:, 2] - boxes[:, 0]
    h = boxes[:, 3] - boxes[:, 1]

    areas = w * h
    order = scores.argsort()[::-1]

    keep = []
    while order.size > 0:
        i = order[0]
        keep.append(i)

        xx1 = np.maximum(x[i], x[order[1:]])
        yy1 = np.maximum(y[i], y[order[1:]])
        xx2 = np.minimum(x[i] + w[i], x[order[1:]] + w[order[1:]])
        yy2 = np.minimum(y[i] + h[i], y[order[1:]] + h[order[1:]])

        w1 = np.maximum(0.0, xx2 - xx1 + 0.00001)
        h1 = np.maximum(0.0, yy2 - yy1 + 0.00001)
        inter = w1 * h1

        ovr = inter / (areas[i] + areas[order[1:]] - inter)
        inds = np.where(ovr <= NMS_THRESH)[0]
        order = order[inds + 1]
    keep = np.array(keep)
    return keep


def yolov5_post_process(input_data):
    masks = [[0, 1, 2], [3, 4, 5], [6, 7, 8]]
    anchors = [[10, 13], [16, 30], [33, 23], [30, 61], [62, 45],
              [59, 119], [116, 90], [156, 198], [373, 326]]

    boxes, classes, scores = [], [], []
    for input,mask in zip(input_data, masks):
        b, c, s = process(input, mask, anchors)
        b, c, s = filter_boxes(b, c, s)
        boxes.append(b)
        classes.append(c)
        scores.append(s)

    boxes = np.concatenate(boxes)
    boxes = xywh2xyxy(boxes)
    classes = np.concatenate(classes)
    scores = np.concatenate(scores)

    nboxes, nclasses, nscores = [], [], []
    for c in set(classes):
        inds = np.where(classes == c)
        b = boxes[inds]
        c = classes[inds]
        s = scores[inds]

        keep = nms_boxes(b, s)

        nboxes.append(b[keep])
        nclasses.append(c[keep])
        nscores.append(s[keep])

    if not nclasses and not nscores:
        return None, None, None

    boxes = np.concatenate(nboxes)
    classes = np.concatenate(nclasses)
    scores = np.concatenate(nscores)

    return boxes, classes, scores

def draw(image, boxes, scores, classes):
    """Draw the boxes on the image.

    # Argument:
        image: original image.
        boxes: ndarray, boxes of objects.
        classes: ndarray, classes of objects.
        scores: ndarray, scores of objects.
        all_classes: all classes name.
    """
    for box, score, cl in zip(boxes, scores, classes):
        top, left, right, bottom = box
        print('class: {}, score: {}'.format(CLASSES[cl], score))
        print('box coordinate left,top,right,down: [{}, {}, {}, {}]'.format(top, left, right, bottom))
        top = int(top)
        left = int(left)
        right = int(right)
        bottom = int(bottom)

        cv2.rectangle(image, (top, left), (right, bottom), (255, 0, 0), 2)
        cv2.putText(image, '{0} {1:.2f}'.format(CLASSES[cl], score),
                    (top, left - 6),
                    cv2.FONT_HERSHEY_SIMPLEX,
                    0.6, (0, 0, 255), 2)


def letterbox(im, new_shape=(640, 640), color=(0, 0, 0)):
    # Resize and pad image while meeting stride-multiple constraints
    shape = im.shape[:2]  # current shape [height, width]
    if isinstance(new_shape, int):
        new_shape = (new_shape, new_shape)

    # Scale ratio (new / old)
    r = min(new_shape[0] / shape[0], new_shape[1] / shape[1])

    # Compute padding
    ratio = r, r  # width, height ratios
    new_unpad = int(round(shape[1] * r)), int(round(shape[0] * r))
    dw, dh = new_shape[1] - new_unpad[0], new_shape[0] - new_unpad[1]  # wh padding

    dw /= 2  # divide padding into 2 sides
    dh /= 2

    if shape[::-1] != new_unpad:  # resize
        im = cv2.resize(im, new_unpad, interpolation=cv2.INTER_LINEAR)
    top, bottom = int(round(dh - 0.1)), int(round(dh + 0.1))
    left, right = int(round(dw - 0.1)), int(round(dw + 0.1))
    im = cv2.copyMakeBorder(im, top, bottom, left, right, cv2.BORDER_CONSTANT, value=color)  # add border
    return im, ratio, (dw, dh)


if __name__ == '__main__':

    # Create RKNN object
    rknn = RKNN(verbose=False)

    if not os.path.exists(PT_MODEL):
        print('model not exist')
        exit(-1)
    _force_builtin_perm = False
    # pre-process config
    print('--> Config model')
    rknn.config(
                reorder_channel='2 1 0',
                mean_values=[[0, 0, 0]],
                std_values=[[255, 255, 255]],
                optimization_level=3,
                # target_platform = 'rk1808',
                target_platform='rv1126',
                quantize_input_node= QUANTIZE_ON,
                output_optimize=1,
                force_builtin_perm=_force_builtin_perm)
    print('done')

    # Load ONNX model
    print('--> Loading model')
    ret = rknn.load_pytorch(model=PT_MODEL, input_size_list=[[3,640, 640]])
    if ret != 0:
        print('Load yolov5 failed!')
        exit(ret)
    print('done')

    # Build model
    print('--> Building model')
    ret = rknn.build(do_quantization=QUANTIZE_ON, dataset=DATASET, pre_compile=True)
    if ret != 0:
        print('Build yolov5 failed!')
        exit(ret)
    print('done')

    # Export RKNN model
    print('--> Export RKNN model')
    ret = rknn.export_rknn(RKNN_MODEL)
    if ret != 0:
        print('Export yolov5rknn failed!')
        exit(ret)
    print('done')

    # # exit()
    # # init runtime environment
    # print('--> Init runtime environment')
    # # ret = rknn.init_runtime()
    # ret = rknn.init_runtime('rv1109', device_id='1109')
    # # ret = rknn.init_runtime('rk1808', device_id='1808')
    # if ret != 0:
    #     print('Init runtime environment failed')
    #     exit(ret)
    # print('done')

    # # Set inputs
    # img = cv2.imread(IMG_PATH)
    # img, ratio, (dw, dh) = letterbox(img, new_shape=(IMG_SIZE, IMG_SIZE))
    # img = cv2.cvtColor(img, cv2.COLOR_BGR2RGB)

    # # Inference
    # print('--> Running model')
    # outputs = rknn.inference(inputs=[img], inputs_pass_through=[0 if not _force_builtin_perm else 1])

    # # post process
    # input0_data = outputs[0]
    # input1_data = outputs[1]
    # input2_data = outputs[2]

    # input0_data = input0_data.reshape([3,-1]+list(input0_data.shape[-2:]))
    # input1_data = input1_data.reshape([3,-1]+list(input1_data.shape[-2:]))
    # input2_data = input2_data.reshape([3,-1]+list(input2_data.shape[-2:]))

    # input_data = list()
    # input_data.append(np.transpose(input0_data, (2, 3, 0, 1)))
    # input_data.append(np.transpose(input1_data, (2, 3, 0, 1)))
    # input_data.append(np.transpose(input2_data, (2, 3, 0, 1)))

    # boxes, classes, scores = yolov5_post_process(input_data)

    # img_1 = cv2.cvtColor(img, cv2.COLOR_RGB2BGR)
    # if boxes is not None:
    #     draw(img_1, boxes, scores, classes)
    # cv2.imshow("post process result", img_1)
    # cv2.waitKeyEx(0)

    rknn.release()
- 1
- 2
- 3
- 4
- 5
- 6
- 7
- 8
- 9
- 10
- 11
- 12
- 13
- 14
- 15
- 16
- 17
- 18
- 19
- 20
- 21
- 22
- 23
- 24
- 25
- 26
- 27
- 28
- 29
- 30
- 31
- 32
- 33
- 34
- 35
- 36
- 37
- 38
- 39
- 40
- 41
- 42
- 43
- 44
- 45
- 46
- 47
- 48
- 49
- 50
- 51
- 52
- 53
- 54
- 55
- 56
- 57
- 58
- 59
- 60
- 61
- 62
- 63
- 64
- 65
- 66
- 67
- 68
- 69
- 70
- 71
- 72
- 73
- 74
- 75
- 76
- 77
- 78
- 79
- 80
- 81
- 82
- 83
- 84
- 85
- 86
- 87
- 88
- 89
- 90
- 91
- 92
- 93
- 94
- 95
- 96
- 97
- 98
- 99
- 100
- 101
- 102
- 103
- 104
- 105
- 106
- 107
- 108
- 109
- 110
- 111
- 112
- 113
- 114
- 115
- 116
- 117
- 118
- 119
- 120
- 121
- 122
- 123
- 124
- 125
- 126
- 127
- 128
- 129
- 130
- 131
- 132
- 133
- 134
- 135
- 136
- 137
- 138
- 139
- 140
- 141
- 142
- 143
- 144
- 145
- 146
- 147
- 148
- 149
- 150
- 151
- 152
- 153
- 154
- 155
- 156
- 157
- 158
- 159
- 160
- 161
- 162
- 163
- 164
- 165
- 166
- 167
- 168
- 169
- 170
- 171
- 172
- 173
- 174
- 175
- 176
- 177
- 178
- 179
- 180
- 181
- 182
- 183
- 184
- 185
- 186
- 187
- 188
- 189
- 190
- 191
- 192
- 193
- 194
- 195
- 196
- 197
- 198
- 199
- 200
- 201
- 202
- 203
- 204
- 205
- 206
- 207
- 208
- 209
- 210
- 211
- 212
- 213
- 214
- 215
- 216
- 217
- 218
- 219
- 220
- 221
- 222
- 223
- 224
- 225
- 226
- 227
- 228
- 229
- 230
- 231
- 232
- 233
- 234
- 235
- 236
- 237
- 238
- 239
- 240
- 241
- 242
- 243
- 244
- 245
- 246
- 247
- 248
- 249
- 250
- 251
- 252
- 253
- 254
- 255
- 256
- 257
- 258
- 259
- 260
- 261
- 262
- 263
- 264
- 265
- 266
- 267
- 268
- 269
- 270
- 271
- 272
- 273
- 274
- 275
- 276
- 277
- 278
- 279
- 280
- 281
- 282
- 283
- 284
- 285
- 286
- 287
- 288
- 289
- 290
- 291
- 292
- 293
- 294
- 295
- 296
- 297
- 298
- 299
- 300
- 301
- 302
- 303
- 304
- 305
3、执行转换
python convert_mask.py
- 1
则会在当前目录下生成mask.rknn
- 分享
- 举报
 微信扫码分享
 QQ好友
QQ好友
 暂无数据
暂无数据-
浏览量:2446次2024-01-18 18:05:38
-
浏览量:1413次2023-09-08 15:20:45
-
浏览量:2729次2024-01-22 17:46:51
-
浏览量:2088次2024-02-05 10:41:25
-
浏览量:6364次2021-01-08 02:27:20
-
浏览量:7101次2021-01-08 02:45:30
-
浏览量:229次2023-08-03 15:44:04
-
浏览量:5156次2024-02-02 17:13:35
-
浏览量:567次2023-09-25 14:19:19
-
浏览量:1715次2024-03-06 16:15:59
-
浏览量:5500次2021-01-08 03:12:37
-
浏览量:9384次2021-01-08 01:26:48
-
浏览量:1913次2024-01-05 16:46:11
-
浏览量:2386次2024-02-19 17:07:05
-
浏览量:2579次2022-10-09 10:38:23
-
浏览量:1867次2024-02-23 17:41:04
-
浏览量:1778次2023-12-19 16:06:28
-
浏览量:802次2024-01-17 16:58:02
-
浏览量:2038次2024-02-19 15:26:47
tomato
===============


-
广告/SPAM
-
恶意灌水
-
违规内容
-
文不对题
-
重复发帖
tomato

 微信支付
微信支付
举报类型
- 内容涉黄/赌/毒
- 内容侵权/抄袭
- 政治相关
- 涉嫌广告
- 侮辱谩骂
- 其他
详细说明
审核成功
审核失败


关注公众号
社区问题咨询:Ebaina-CN
定制需求咨询:xxqk158820
