Hi3516Dv300 平台使用MIPI Tx点屏
背景
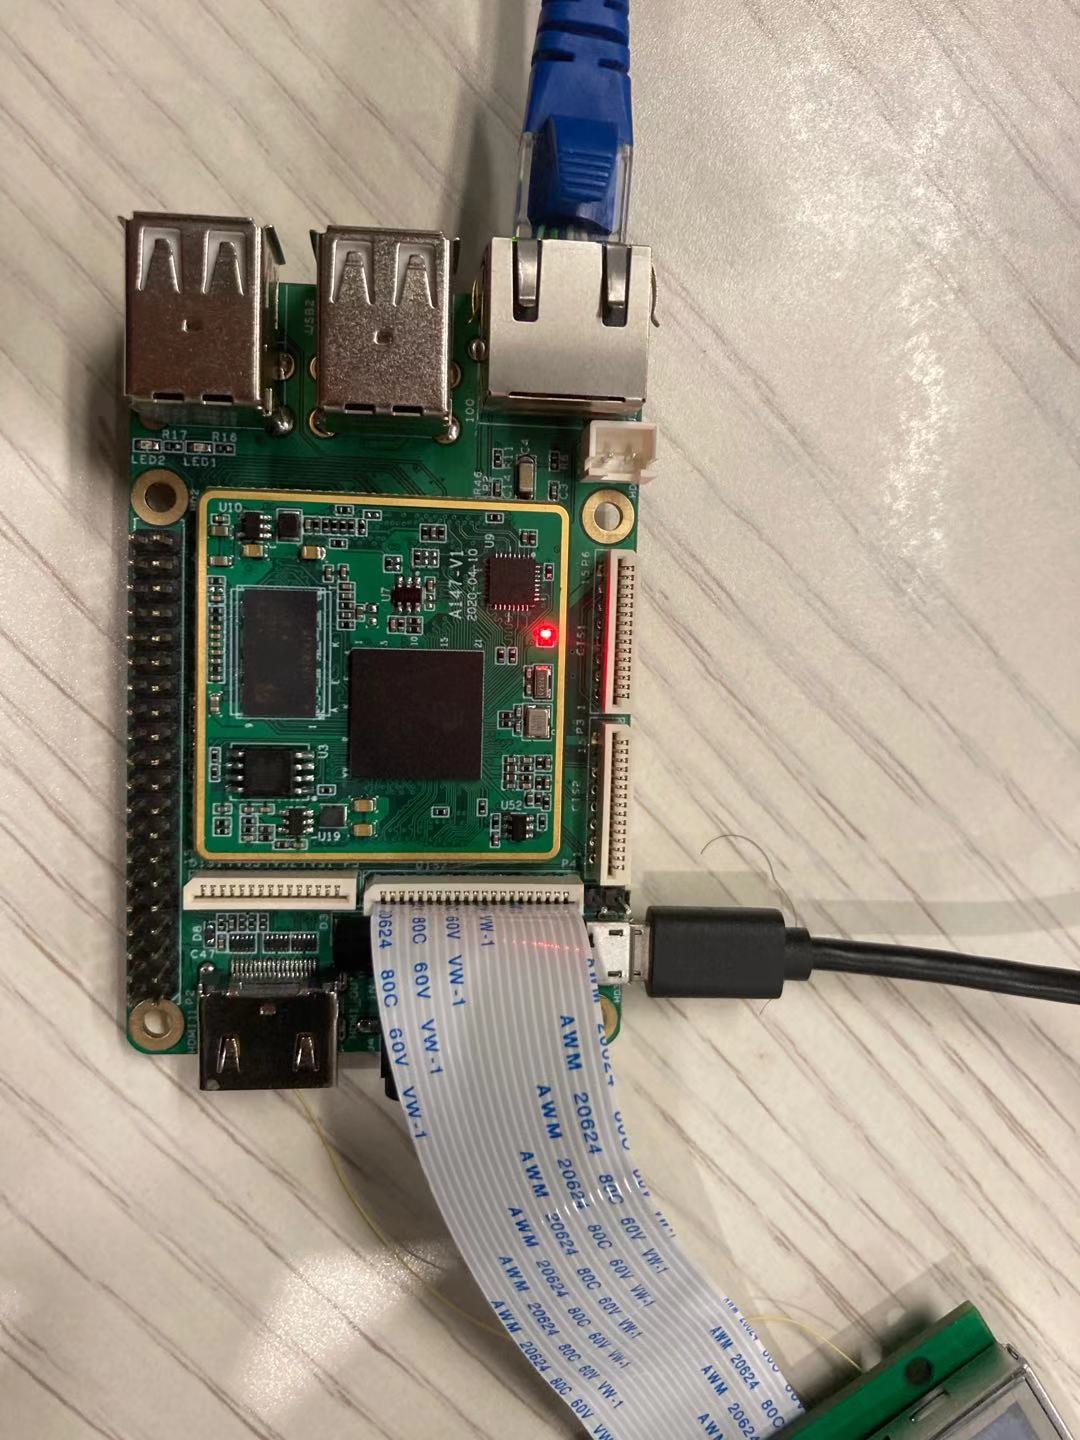
公司新做了一块3516Dv300的开发板,其中有MIPI Tx接口,刚好公司库房还有好几百块的LCD屏,LCD屏是800x480的,还是原装屏,不用掉怪可惜的了,所以就让硬件的同事化了个转接板,使用的芯片是ICN6211,这货最大分辨率可以支持到1920x1200,感兴趣的小伙伴自己下个手册看看。
调试过程
MIPI屏一般都有一组寄存器需要初始化,这个可以根据使用的芯片资料来初始化,大部分厂家会提供初始化寄存器,使用的MIPI Command Mode,至于怎么使用,大家自己去Google。我们这边使用ICN6211可以I2C来初始化。
1. 屏参填充
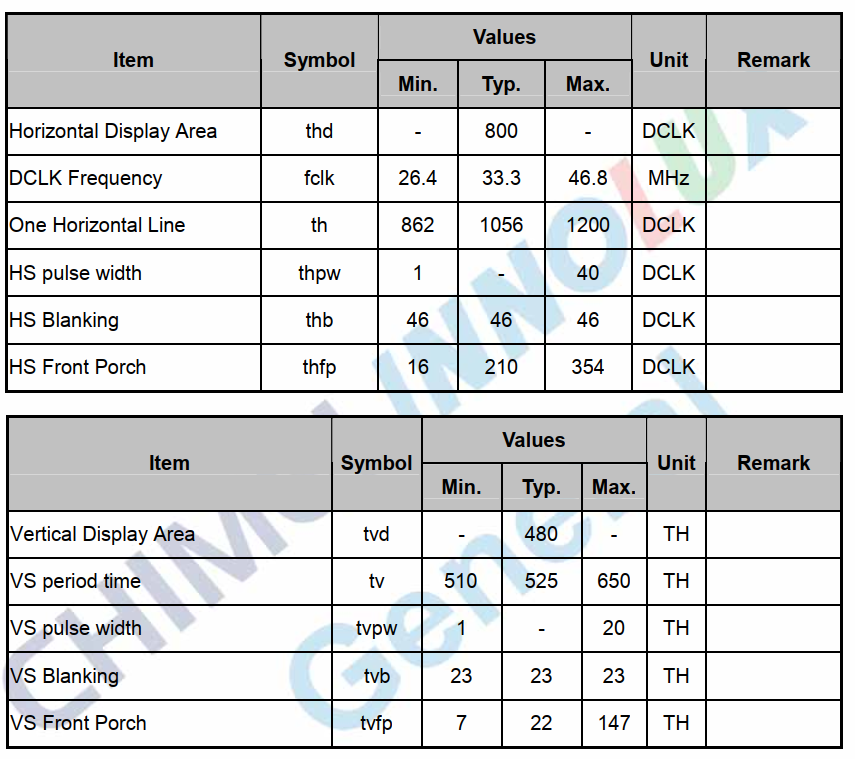
屏的调试最为复杂的地方就是填写各种时许、前后消影、时钟等信息,这个必须要和自己的的屏匹配起来.我是用的屏的型号是AT070TN94,找到下面的信息:

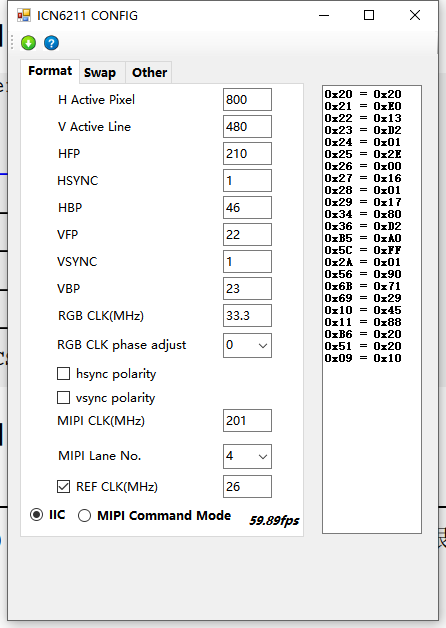
打开ICN6211 CONFIG工具,配置如下:

将生成的的寄存器初始化转换为海思工具配置
#!/bin/sh
i2c_write  0  0x58 0x20  0x20
i2c_write  0  0x58 0x21  0xE0
i2c_write  0  0x58 0x22  0x13
i2c_write  0  0x58 0x23  0xD2
i2c_write  0  0x58 0x24  0x01
i2c_write  0  0x58 0x25  0x2E
i2c_write  0  0x58 0x26  0x00
i2c_write  0  0x58 0x27  0x16
i2c_write  0  0x58 0x28  0x01
i2c_write  0  0x58 0x29  0x17
i2c_write  0  0x58 0x34  0x80
i2c_write  0  0x58 0x36  0xD2
i2c_write  0  0x58 0xB5  0xA0
i2c_write  0  0x58 0x5C  0xFF
i2c_write  0  0x58 0x2A  0x01
i2c_write  0  0x58 0x56  0x90
i2c_write  0  0x58 0x6B  0x71
i2c_write  0  0x58 0x69  0x29
i2c_write  0  0x58 0x10  0x40
i2c_write  0  0x58 0x11  0x88
i2c_write  0  0x58 0xB6  0x20
i2c_write  0  0x58 0x51  0x20
#i2c_write  0  0x58 0x14  0x043  #color bar
#i2c_write  0  0x58 0x2a  0x049  #color bar
i2c_write  0  0x58 0x09  0x10
特别注意的是#color的2行,这2行打开可以验证你的硬件连接是否是OK的,硬件正常的化就可以看到一个ColorBar彩条,这是关进的一步。
2.修改代码
使用的测试DEMO为sample_tde,注意将hifb的宽高设置为800x480,他的默认参数是720x576,申请fb的地方也注意修改下,和时许相关的地方为:
-
fb参数修改
这一块的修改非常重要,不然你的图像VO色彩是对的,fb及Qt界面的色彩不对,这个地方花费了我一天半的时间。具体的修改为fb打开后配置如下参数:VO_CSC_S stVoCSC; s32Ret = HI_MPI_VO_GetGraphicLayerCSC(GRAPHICS_LAYER_G0, &stVoCSC); stVoCSC.enCscMatrix = VO_CSC_MATRIX_IDENTITY; s32Ret = HI_MPI_VO_SetGraphicLayerCSC(GRAPHICS_LAYER_G0, &stVoCSC); -
VO参数修改
917 HI_S32 SAMPLE_COMM_VO_GetDefConfig(SAMPLE_VO_CONFIG_S *pstVoConfig) 918 { 919 RECT_S stDefDispRect = {0, 0, 800, 480}; //800x480 920 SIZE_S stDefImageSize = {800, 480}; //800x480 921 HI_U32 u32ChipId; 922 if(NULL == pstVoConfig) 923 { 924 SAMPLE_PRT("Error:argument can not be NULL\n"); 925 return HI_FAILURE; 926 } 927 928 pstVoConfig->VoDev = SAMPLE_VO_DEV_UHD; 929 930 HI_MPI_SYS_GetChipId(&u32ChipId); 931 932 if(HI3516C_V500 == u32ChipId) 933 { 934 pstVoConfig->enVoIntfType = VO_INTF_BT1120; 935 } 936 else 937 { 938 pstVoConfig->enVoIntfType =VO_INTF_MIPI; 939 } 940 pstVoConfig->enIntfSync = VO_OUTPUT_USER; //VO_OUTPUT_1080P60; 941 pstVoConfig->u32BgColor = COLOR_RGB_WHITE;//COLOR_RGB_YELLOW; 942 pstVoConfig->enPixFormat = PIXEL_FORMAT_YVU_SEMIPLANAR_422; 943 pstVoConfig->stDispRect = stDefDispRect; 944 pstVoConfig->stImageSize = stDefImageSize; -
VO自定义时许修改
自定义时许修改最为复杂的部分是PLL计算,好在海思提供了RGB_MIPI屏幕时钟时序计算器.xlsx 这个工具实在太好用了,至少要节省你一天的调试时间,给伟大的海思点个赞。422 HI_S32 SAMPLE_COMM_VO_StartDev(VO_DEV VoDev, VO_PUB_ATTR_S* pstPubAttr) 423 { 424 HI_S32 s32Ret = HI_SUCCESS; 425 VO_USER_INTFSYNC_INFO_S stUserInfo; 426 if(pstPubAttr->enIntfSync == VO_OUTPUT_USER) { 427 pstPubAttr->stSyncInfo.bSynm = 0; 428 pstPubAttr->stSyncInfo.bIop = 1; 429 pstPubAttr->stSyncInfo.u8Intfb = 0; 430 pstPubAttr->stSyncInfo.u16Vact = 480; 431 pstPubAttr->stSyncInfo.u16Vbb = 24; 432 pstPubAttr->stSyncInfo.u16Vfb = 22; 433 pstPubAttr->stSyncInfo.u16Hbb = 47; 434 pstPubAttr->stSyncInfo.u16Hact= 800; 435 pstPubAttr->stSyncInfo.u16Hfb= 210; 436 pstPubAttr->stSyncInfo.u16Hmid= 0; 437 pstPubAttr->stSyncInfo.u16Bvact=0; 438 pstPubAttr->stSyncInfo.u16Bvbb =0; 439 pstPubAttr->stSyncInfo.u16Bvfb =0; 440 pstPubAttr->stSyncInfo.u16Hpw = 1; 441 pstPubAttr->stSyncInfo.u16Vpw = 1; 442 pstPubAttr->stSyncInfo.bIdv = HI_FALSE; 443 pstPubAttr->stSyncInfo.bIhs = HI_FALSE; 444 pstPubAttr->stSyncInfo.bIvs = HI_FALSE; 445 } 446 s32Ret = HI_MPI_VO_SetPubAttr(VoDev, pstPubAttr); 447 if (s32Ret != HI_SUCCESS) 448 { 449 SAMPLE_PRT("failed with %#x!\n", s32Ret); 450 return HI_FAILURE; 451 } 452 453 if(pstPubAttr->enIntfSync == VO_OUTPUT_USER) { 454 stUserInfo.u32PreDiv = 1; 455 stUserInfo.u32DevDiv = 1; 456 stUserInfo.bClkReverse = HI_FALSE; 457 #if 1 458 stUserInfo.stUserIntfSyncAttr.enClkSource = VO_CLK_SOURCE_PLL; 459 stUserInfo.stUserIntfSyncAttr.stUserSyncPll.u32Fbdiv = 272; 460 stUserInfo.stUserIntfSyncAttr.stUserSyncPll.u32Frac = 0x6e61cf; 461 stUserInfo.stUserIntfSyncAttr.stUserSyncPll.u32Refdiv = 4; 462 stUserInfo.stUserIntfSyncAttr.stUserSyncPll.u32Postdiv1 = 7; 463 stUserInfo.stUserIntfSyncAttr.stUserSyncPll.u32Postdiv2 = 7; 464 #else -
MIPI 配置添加
这个是给MIPI Tx驱动使用的,需要让MIPI Tx输出该时许,按照参数一路修改下来就可以看到了:190 combo_dev_cfg_t MIPI_TX_800X480_60_CONFIG = 191 { 192 .devno = 0, 193 .lane_id = {0, 1, 2, 3}, 194 .output_mode = OUTPUT_MODE_DSI_VIDEO, 195 .output_format = OUT_FORMAT_RGB_24_BIT, 196 .video_mode = BURST_MODE, 197 .sync_info = { 198 .vid_pkt_size = 800, 199 .vid_hsa_pixels = 1, 200 .vid_hbp_pixels = 46, 201 .vid_hline_pixels = 1057, 202 .vid_vsa_lines = 1, 203 .vid_vbp_lines = 23, 204 .vid_vfp_lines = 22, 205 .vid_active_lines = 480, 206 .edpi_cmd_size = 0, 207 }, 208 .phy_data_rate = 459, // 401 209 .pixel_clk = 33359, 210 };
3.系统及驱动修改
- 开机脚本修改
将板子上load3516dv300里面的mipi_tx驱动打开
insmod hi_mipi_tx.ko - sys_config.ko修改
676     //vo_bt1120_mode_mux();
677     //vo_bt656_mode_mux();
678     mipi_tx_lcd_mux(4);   // 打开,其余的关闭
679    // hdmi_pin_mux();
680     //vo_24bit_lcd_mux();
681    // mipi_tx_set_rest();
682     //spi1_pin_mux();
683     //vo_6bit_lcd_mux();
684     //vo_8bit_lcd_reset();
685     //vo_8bit_lcd_mux();
686     //i2s0_pin_mux();
687     return 0;
4. 运行程序
将sample_tde 及目录下的res 拷贝到板子上,或者NFS目录
./sample_tde  0
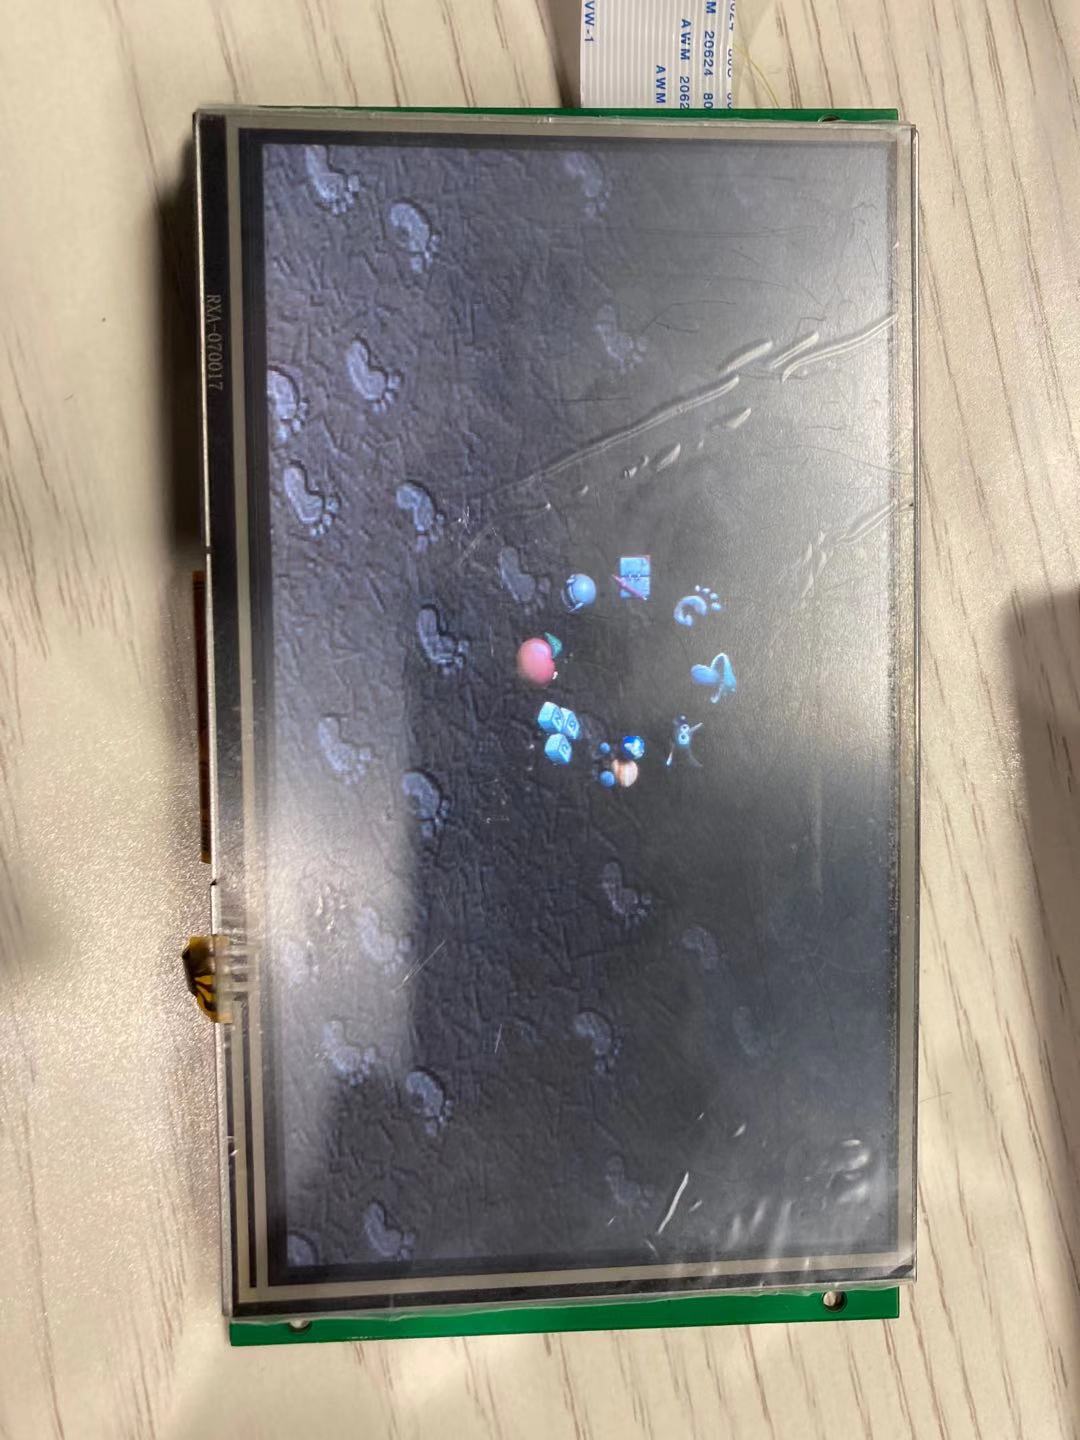
# enjoy!!

- 分享
- 举报
-
浏览量:4635次2022-10-13 17:29:06
-
浏览量:3659次2022-10-14 10:34:46
-
浏览量:9158次2022-06-01 10:01:04
-
浏览量:6086次2023-03-20 13:32:44
-
浏览量:3411次2023-07-12 15:22:31
-
浏览量:2353次2024-06-06 09:47:33
-
浏览量:3622次2023-06-28 15:57:28
-
浏览量:2614次2023-11-06 11:04:59
-
浏览量:2652次2023-06-12 14:18:20
-
浏览量:1906次2023-06-12 14:18:15
-
浏览量:5980次2022-10-17 20:51:39
-
浏览量:2084次2024-01-13 18:14:30
-
浏览量:8266次2020-09-17 16:12:59
-
浏览量:2095次2023-06-20 16:09:54
-
浏览量:2147次2023-12-28 14:24:27
-
浏览量:2404次2024-01-08 16:49:01
-
浏览量:5344次2020-09-30 18:01:11
-
浏览量:1344次2023-06-21 10:04:00
-
浏览量:2575次2023-06-12 14:34:37
-
广告/SPAM
-
恶意灌水
-
违规内容
-
文不对题
-
重复发帖
易百纳用户79822


 微信支付
微信支付举报类型
- 内容涉黄/赌/毒
- 内容侵权/抄袭
- 政治相关
- 涉嫌广告
- 侮辱谩骂
- 其他
详细说明


 微信扫码分享
 QQ好友
QQ好友


感谢goodman大神的分享,
如何联系楼主,有个问题想请教下楼主